- Broschiertes Buch
- Merkliste
- Auf die Merkliste
- Bewerten Bewerten
- Teilen
- Produkt teilen
- Produkterinnerung
- Produkterinnerung
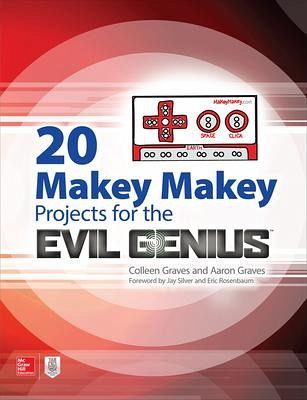
20 fun and inventive Makey Makey projects for Makers from beginner to expert
Andere Kunden interessierten sich auch für
- Reade RichardMake: AI Robots23,99 €
- Michael ShilohGetting Started With Arduino15,99 €
- Isaac GlendeningMakerspace Sound and Music Projects for All Ages27,99 €
- Yolanda RidgeCrispr15,99 €
- Andrea GonzalesGirl Code12,99 €
- Donald NorrisProgramming with Stm3224,99 €
- David CrookesCode the Classics Volume I27,99 €
-
-
-
20 fun and inventive Makey Makey projects for Makers from beginner to expert
Hinweis: Dieser Artikel kann nur an eine deutsche Lieferadresse ausgeliefert werden.
Produktdetails
- Produktdetails
- Verlag: McGraw-Hill Education
- Seitenzahl: 224
- Erscheinungstermin: 21. Juni 2017
- Englisch
- Abmessung: 274mm x 220mm x 22mm
- Gewicht: 580g
- ISBN-13: 9781259860461
- ISBN-10: 1259860469
- Artikelnr.: 46005435
- Herstellerkennzeichnung
- Libri GmbH
- Europaallee 1
- 36244 Bad Hersfeld
- 06621 890
Colleen Graves is a high school librarian and blogger, obsessed with Learning Commons transformations, Makerspaces, technology education, making stuff, and getting girls involved in STEM. She offers the unique perspective of starting/creating two different makerspaces and Girl STEM groups in established public schools. Aaron Graves is a school librarian with 15 years of experience. He is a mash-up of robot geek, book lover, and tech wizard. Aaron gained his perseverance for projects through collaborative and interactive art experiences as a member of the Good/Bad Art Collective.
An Introduction to Physical Computing
Section One Fun and Games
Project 1 Makey Makey Spin Art with Motors
Step 1: Motor Size and Voltage
Step 2: Motor Test
Step 3: Cold Cuts, Hot Glue, and Takeout
Step 4: Switch
Step 5: Power Up the Makey Makey
Step 6: Sticky Note Spin-Out Art
Taking It Further
Project 2 Cootie-Catcher Paper Circuit with Makey Makey
Create Scratch Game
Step 1: Create Account and Get Started
Step 2: Program Arrow Keys in Scratch
Step 3: Program "W" and "A"
Create Cootie Catcher
Step 1: Print Template, Cut, and Fold
Step 2: Conductive Tape on Arrows
Step 3: Refold
Step 4: Conductive Tape on EARTH
Step 5: Prepare Wires
Step 6: Connect Prepared Wiring to Cootie Catcher
Step 7: Prepare "w" and "a" Connections
Step 8: Create an EARTH Connection
Step 9: Connect to the Makey Makey
Step 10: Test Connections
Step 11: Tell Fortunes!
Taking It Further
Project 3 Makey Makey Marble Maze
Build a Maze and Switches
Step 1: Find a Big Flat Box and Design a Maze
Step 2: Build Walls with Straws and Hot Glue
Step 3: Create Switches at Traps
Step 4: Test Switches/Debug
Step 5: Power LEDs
Optional Tinkering: Chibitronics and LED Powered with Makey Makey
Step 1: Extend Wiring
Step 2: Hook Up the Makey Makey
Program in Scratch
Step 1: Key Press Scripts
Step 2: Add Variables
Add a Timer
Step 3: Set the Timer to Start
Step 4: Make Seconds
Step 5: Make Minutes
Step 6: Add Timed Sounds
Debug the Timer
Taking It Further
Project 4 Makey Makey Arcade Coin Slot
Step 1: Create a Slot
Step 2: Z-Shaped Paperclip Swing Switch
Step 3: Placement and Fine Tuning
Step 4: Use the Coin Slot with Existing Games
Taking It Further
Project 5 Arcade-Style Fortune Teller
Build Character and Arcade Box
Step 1: Create a Character
Step 2: Make Arms with Conductive Hands
Step 3: Wire Arms
Step 4: Reset Switch and Connecting Coin Slot
Program with Scratch
Step 1: Variables in Scratch
Step 2: Animate Backdrops
Step 3: Animate Eyes and Mouth
Step 4: Record Sounds
Step 5: Reset/Start Button and Resting State
Step 6: "Repeat" Block
Step 7: Debug with "if/then"
Step 8: Coin Drop
Step 9: Set Variables
Step 10: More Debugging with "if/then"
Step 11: Crazy Eyes
Step 12: Play Fortunes
Step 13: Loose Ends, Variables, and Broadcasts
Step 14: Final Setup
Taking It Further
Project 6 Build Your Own Pinball Machine
Step 1: Cut It Out
Step 2: Frame and Base Assembly for Pinball Machine with Ball Return
Step 3: Box Assembly for Simple Pinball Machine
Step 4: Ball Launcher
Step 5: Curve
Step 6: Flippers
Step 7: Actuators
Step 8: Simple 1- by 2-Inch Push Stick Actuators
Step 9: Rod Actuators
Step 10: Legs and Laptop Holder
Step 11: Bumpers, Guides, and Obstacles
Step 12: Wiring and Scratch Link
Step 13: Launcher Switch
Step 14: Ball Return Switches
Step 15: Bell Switch
Step 16: Rail Track Switch
Step 17: Swing Switch
Step 18: Basket of Nails
Step 19: Teeter-Totter Channel Switch
Taking It Further
Section Two Interactive
Project 7 Cookie Jar Alarm
Step 1: Pick a Jar
Step 2: The Latch Switch
Step 3: Lift Lid Switch
Step 4: Simple Scratch Alarm
Step 5: Keep Minions from Eating Cookies
Taking It Further
Project 8 Makey Makey Light-Up Morse Code Machine
Step 1: Make a Tower
Step 2: Assembly
Step 3: Wire a Button to Cardboard
Step 4: Send Secret Messages
Taking It Further
Project 9 Makey Makey Etch-a-Processing Sketch
Write a Sketch in Processing
Step 1: Look Around Processing
Step 2: void setup()
Step 3: void draw()
Step 4: Track Mouse Movement
Step 5: Test
Step 6: Tinker with strokeWeight()
Make an Etch-a-Sketch Box
Step 1: Prepare Box and Drill Holes
Step 2: Prepare the Box with Conductive Paint
Step 3: Transform Lids into Controllers
Step 4: Attach the Lids to the Box
Step 5: Hook Up Your Makey Makey and Play!
Taking It Further
Project 10 Makey Makey Musical Hoodie (Interactive Clothing)
Make a Fabric Switch
Step 1: Prepare Fabric Iron Fusible Interfacing to Fabric
Step 2: Create a Template and Cut Out Shapes
Step 3: Connect Conductive Switch Pads
Step 4: Sew the Switch Together
Step 5: Repeat for All Shapes
Step 6: Test Your Fabric Switches
Sew Circuitry
Step 1: Adhere Shapes
Step 2: Make Conductive Patches
Step 3: Map Circuitry
Step 4: Sew Circuit Key Presses
Step 5: Sew Negative
Step 6: Insulate the Circuitry
Step 7: Create Soft Leads (Or Use Alligator Clips)
Program and Hook to Makey Makey
Step 1: Raspberry Pi
Step 2: Hook Alligator Clips or Soft Leads
Step 3: Hide the Electronics
Taking It Further
One-Banana Hack of Musical Hoodie: Hack a Plushie
Step 1: Make a Fabric Switch from the Previous Instructions
Step 2: Create a Pair of Soft Leads for the Key Press and for EARTH
Step 3: Affix Fabric Switch with Glue and Hand Sew Snaps
Step 4: Make a One-Button Game in Scratch
Step 5: Nest "If/Else" Statements
Taking It Further
Project 11 Makey Makey Swipe Input
Step 1: Create a Drawing
Step 2: Create a List (Array) in Scratch
Step 3: Add to Target
Step 4: Set Gestures
Step 5: Forever, If, Repeat
Step 6: Create a Second Target
Step 7: Program
Taking It Further
Section Three Hacks and Pranks
Project 12 Hacking a Kid's Toy with Makey Makey
Hack Keyboard Toy
Step 1: Take Out the Battery
Step 2: Open Up the Toy
Step 3: Investigate Easy Places to Create Switches
Step 4: Hack Dome Switches
Step 5: Create Keyboard Switches with Copper Tape
Step 6: Put It Back Together
Step 7: Remap Makey Makey Buttons
Program with Scratch!
Step 1: Remix Piano Project
Step 2: Label Sprites with Key Press
Step 3: Add "Change instrument"
Step 4: Add Sound Effects and "Stop all"
Step 5: Create a Copy and Add Sound Effects
Step 6: Create Another Copy and Record Sounds
Step 7: Rotate between Scratch Games to Make Music
Taking It Further
Project 13 One-Banana Hack: Hacking a Kid's Toy
Step 1: Determine Conductivity
Step 2: Open Up the Toy Xylophone
Step 3: Wrap the Xylophone Keys with Conductive Tape
Step 4: Test Ring Sound
Step 5: Create EARTH with Mallet
Step 6: Program with Scratch
Taking It Further
Project 14 Makey Makey Power Tail Prank
Step 1: Make a Plan
Step 2: Makey Makey to PowerSwitch Tail II
Create a Pillow Switch
Step 1: Measure and Cut Fabric
Step 2: Tape Traces
Step 3: Wide Zigzag Stitch
Step 4: Hem, Pin, Sew
Step 5: Insulate Your Switch
Step 6: Put It All Together
Taking It Further
Project 15 Makey Makey Lock Box
Create a Lock Program in Scratch
Step 1: Create Lists
Step 2: Program Keys
Step 3: If This, Do That
Create a Lock Box
Step 1: Mark Brad Placement
Step 2: Label Keys and Hook Up Makey Makey
Step 3: Get Ready to Play!
Taking It Further
Section Four About Makey Makey Go
Project 16 Makey Go No Donut Prank
Step 1: Make a Hassle
Step 2: Make It Totally Random
Step 3: Set the Trap
Step 4: Test and Watch
Taking It Further
Project 17 Makey Go "Chopsticks"
Create Scratch Program
Step 1: Create and Set Variables
Step 2: Add Sounds in "Sounds" Tab
Step 3: Play Sound and Change Note (Left Hand)
Step 4: Play Sound and Change Note (Right Hand)
Step 5: If Counter Reaches Last Note, Reset to Beginning
Conductive Chopstick and Dipping Bowl
Step 1: Create Conductive Chopstick and Dipping Bowl
Step 2: Dip It Real Good!
Taking It Further
Project 18 Makey Go "Heart and Soul" Plant Kalimba (Thumb Piano)
Program Tones
Step 1: Play a Song
Step 2: Create Variable and Set Instrument
Step 3: "If" and "Or"
Create Kalimba
Step 1: Dig Up Supplies
Taking It Further
Project 19 Makey Go Cat Clicking Game
Step 1: Backdrops and Sprites
Step 2: Lion Click Counters
Step 3: Instructions and Insurance
Step 4: Backdrop Switch and Click Count
Step 5: Plug and Play!
Taking It Further
Project 20 Makey Go Lemon Squeezy
Step 1: Lemon Drops and Sprites
Step 2: Set Up Variables and Start Screen
Step 3: Variable Setting and Scoring Equations
Step 4: Countdown Clock
Step 5: Click and Clack
Step 6: Connect and Play Tips
Taking It Further
Index