264,99 €
264,99 €
inkl. MwSt.
Sofort per Download lieferbar
payback
0 °P sammeln
264,99 €
264,99 €
inkl. MwSt.
Sofort per Download lieferbar

Alle Infos zum eBook verschenken
payback
0 °P sammeln
Als Download kaufen
264,99 €
inkl. MwSt.
Sofort per Download lieferbar
payback
0 °P sammeln
Jetzt verschenken
264,99 €
inkl. MwSt.
Sofort per Download lieferbar

Alle Infos zum eBook verschenken
payback
0 °P sammeln
  • Format: PDF

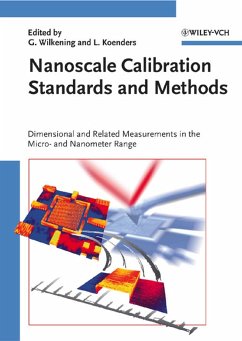
The quantitative determination of the properties of micro- and nanostructures is essential in research and development. It is also a prerequisite in process control and quality assurance in industry. The knowledge of the geometrical dimensions of structures in most cases is the base, to which other physical and chemical properties are linked. Quantitative measurements require reliable and stable instruments, suitable measurement procedures as well as appropriate calibration artefacts and methods. The seminar "NanoScale 2004" (6th Seminar on Quantitative Microscopy and 2nd Seminar on Nanoscale…mehr

Produktbeschreibung
The quantitative determination of the properties of micro- and nanostructures is essential in research and development. It is also a prerequisite in process control and quality assurance in industry. The knowledge of the geometrical dimensions of structures in most cases is the base, to which other physical and chemical properties are linked. Quantitative measurements require reliable and stable instruments, suitable measurement procedures as well as appropriate calibration artefacts and methods. The seminar "NanoScale 2004" (6th Seminar on Quantitative Microscopy and 2nd Seminar on Nanoscale Calibration Standards and Methods) at the National Metrology Institute (Physikalisch-Technische Bundesanstalt PTB), Braunschweig, Germany, continues the series of seminars on Quantitative Microscopy. The series stimulates the exchange of information between manufacturers of relevant hard- and software and the users in science and industry. Topics addressed in these proceedings are a) the application of quantitative measurements and measurement problems in: microelectronics, microsystems technology, nano/quantum/molecular electronics, chemistry, biology, medicine, environmental technology, materials science, surface processing b) calibration & correction methods: calibration methods, calibration standards, calibration procedures, traceable measurements, standardization, uncertainty of measurements c) instrumentation and methods: novel/improved instruments and methods, reproducible probe/sample positioning, position-measuring systems, novel/improved probe/detector systems, linearization methods, image processing

Dieser Download kann aus rechtlichen Gründen nur mit Rechnungsadresse in A, B, BG, CY, CZ, D, DK, EW, E, FIN, F, GR, HR, H, IRL, I, LT, L, LR, M, NL, PL, P, R, S, SLO, SK ausgeliefert werden.

Autorenporträt
Günter Wilkening, Prof. Dr., Physikalisch-Technische Bundesanstalt, Braunschweig, Director of the Department of Nano- and Micrometrology Günter Wilkening received his Ph.D. in Solid State Physics from the Technical University of Braunschweig, Germany, in 1977. In 1978, he joined the National Metrology Institute (Physikalisch-Technische Bundesanstalt PTB), where he conducts research in the fields of force measurement and dimensional measurements in the micro- and nanometre range. Since 1988 he has been involved in Scanning Probe Microscopy and its use for quantitative measurements. In 1994, Professor Wilkening became head of the Nano- and Micrometrology Department. He is an active member of a number of national and international committees. Ludger Koenders, Dr. Physikalisch-Technische Bundesanstalt, Braunschweig, Layer Thickness and Nanostructures Department Ludger Koenders is head of the Film Thickness and Nanostructures Research Group at the National Metrology Institute (Technische Bundesanstalt PTB) in Braunschweig, Germany. He received his Diploma and his Ph.D. in Physics from the University of Duisburg. For his Ph.D. thesis he investigated the adsorption of hydrogen and oxygen on III-V semiconductor surfaces using surface analytical techniques (AES, EELS, UPS, XPS) and resonant Raman spectroscopy. He joined the National Metrology Institute in 1989 and has worked on investigations of tip-sample effects in STM, on the development metrological SPM and of transfer standards for SPM. He has co-ordinated several international comparisons in the field of step height and surface roughness measurements.