Practical Residual Stress Measurement Methods (eBook, PDF)
Redaktion: Schajer, Gary S.


Alle Infos zum eBook verschenken

Practical Residual Stress Measurement Methods (eBook, PDF)
Redaktion: Schajer, Gary S.
- Format: PDF
- Merkliste
- Auf die Merkliste
- Bewerten Bewerten
- Teilen
- Produkt teilen
- Produkterinnerung
- Produkterinnerung

Hier können Sie sich einloggen

Bitte loggen Sie sich zunächst in Ihr Kundenkonto ein oder registrieren Sie sich bei bücher.de, um das eBook-Abo tolino select nutzen zu können.
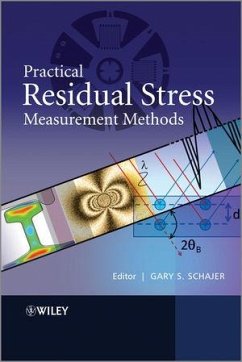
An introductory and intermediate level handbook written in pragmatic style to explain residual stresses and to provide straightforward guidance about practical measurement methods. Residual stresses play major roles in engineering structures, with highly beneficial effects when designed well, and catastrophic effects when ignored. With ever-increasing concern for product performance and reliability, there is an urgent need for a renewed assessment of traditional and modern measurement techniques. Success critically depends on being able to make the most practical and effective choice of…mehr
- Geräte: PC
- mit Kopierschutz
- eBook Hilfe
- Größe: 7.92MB
![Practical Residual Stress Measurement Methods (eBook, ePUB) Practical Residual Stress Measurement Methods (eBook, ePUB)]() Practical Residual Stress Measurement Methods (eBook, ePUB)113,99 €
Practical Residual Stress Measurement Methods (eBook, ePUB)113,99 €![Optimal Modified Continuous Galerkin CFD (eBook, PDF) Optimal Modified Continuous Galerkin CFD (eBook, PDF)]() A. BakerOptimal Modified Continuous Galerkin CFD (eBook, PDF)121,99 €
A. BakerOptimal Modified Continuous Galerkin CFD (eBook, PDF)121,99 €![Dynamics of Lattice Materials (eBook, PDF) Dynamics of Lattice Materials (eBook, PDF)]() Dynamics of Lattice Materials (eBook, PDF)109,99 €
Dynamics of Lattice Materials (eBook, PDF)109,99 €![Wear (eBook, PDF) Wear (eBook, PDF)]() Wear (eBook, PDF)159,99 €
Wear (eBook, PDF)159,99 €![Reactions and Mechanisms in Thermal Analysis of Advanced Materials (eBook, PDF) Reactions and Mechanisms in Thermal Analysis of Advanced Materials (eBook, PDF)]() Reactions and Mechanisms in Thermal Analysis of Advanced Materials (eBook, PDF)197,99 €
Reactions and Mechanisms in Thermal Analysis of Advanced Materials (eBook, PDF)197,99 €![Introduction to Impact Dynamics (eBook, PDF) Introduction to Impact Dynamics (eBook, PDF)]() T. X. YuIntroduction to Impact Dynamics (eBook, PDF)100,99 €
T. X. YuIntroduction to Impact Dynamics (eBook, PDF)100,99 €![Linear Systems (eBook, PDF) Linear Systems (eBook, PDF)]() Henri BourlèsLinear Systems (eBook, PDF)160,99 €
Henri BourlèsLinear Systems (eBook, PDF)160,99 €-
-
-
Dieser Download kann aus rechtlichen Gründen nur mit Rechnungsadresse in A, B, BG, CY, CZ, D, DK, EW, E, FIN, F, GR, HR, H, IRL, I, LT, L, LR, M, NL, PL, P, R, S, SLO, SK ausgeliefert werden.
Hinweis: Dieser Artikel kann nur an eine deutsche Lieferadresse ausgeliefert werden.
- Produktdetails
- Verlag: Wiley-Blackwell
- Seitenzahl: 328
- Erscheinungstermin: 2. August 2013
- Englisch
- ISBN-13: 9781118402818
- Artikelnr.: 39477445
- Verlag: Wiley-Blackwell
- Seitenzahl: 328
- Erscheinungstermin: 2. August 2013
- Englisch
- ISBN-13: 9781118402818
- Artikelnr.: 39477445
- Herstellerkennzeichnung Die Herstellerinformationen sind derzeit nicht verfügbar.
vs. sin2
Data 143 6.3.1 D
olle-Hauk Method 143 6.3.2 Winholtz-Cohen Least-squares Analysis 143 6.4 Calculation of Stresses 145 6.5 Effect of Sample Microstructure 146 6.6 X-ray Elastic Constants (XEC) 149 6.6.1 Constitutive Equation 150 6.6.2 Grain Interaction 151 6.7 Examples 153 6.7.1 Isotropic, Biaxial Stress 153 6.7.2 Triaxial Stress 154 6.7.3 Single-crystal Strain 156 6.8 Experimental Considerations 159 6.8.1 Instrumental Errors 159 6.8.2 Errors Due to Counting Statistics and Peak-fitting 159 6.8.3 Errors Due to Sampling Statistics 159 6.9 Summary 160 Acknowledgments 160 References 160 7 Synchrotron X-ray Diffraction 163 Philip Withers 7.1 Basic Concepts and Considerations 163 7.1.1 Introduction 163 7.1.2 Production of X-rays; Undulators, Wigglers, and Bending Magnets 166 7.1.3 The Historical Development of Synchrotron Sources 167 7.1.4 Penetrating Capability of Synchrotron X-rays 169 7.2 Practical Measurement Procedures and Considerations 169 7.2.1 Defining the Strain Measurement Volume and Measurement Spacing 170 7.2.2 From Diffraction Peak to Lattice Spacing 173 7.2.3 From Lattice Spacing to Elastic Strain 173 7.2.4 From Elastic Strain to Stress 178 7.2.5 The Precision of Diffraction Peak Measurement 179 7.2.6 Reliability, Systematic Errors and Standardization 180 7.3 Angle-dispersive Diffraction 184 7.3.1 Experimental Set-up, Detectors, and Data Analysis 184 7.3.2 Exemplar: Mapping Stresses Around Foreign Object Damage 186 7.3.3 Exemplar: Fast Strain Measurements 187 7.4 Energy-dispersive Diffraction 188 7.4.1 Experimental Set-up, Detectors, and Data Analysis 189 7.4.2 Exemplar: Crack Tip Strain Mapping at High Spatial Resolution 189 7.4.3 Exemplar: Mapping Stresses in Thin Coatings and Surface Layers 190 7.5 New Directions 191 7.6 Concluding Remarks 192 References 193 8 Neutron Diffraction 195 Thomas M. Holden 8.1 Introduction 195 8.1.1 Measurement Concept 195 8.1.2 Neutron Technique 196 8.1.3 Neutron Diffraction 196 8.1.4 3-Dimensional Stresses 198 8.1.5 Neutron Path Length 198 8.2 Formulation 199 8.2.1 Determination of the Elastic Strains from the Lattice Spacings 199 8.2.2 Relationship between the Measured Macroscopic Strain in a given Direction and the Elements of the Strain Tensor 199 8.2.3 Relationship between the Stress
i,j and Strain
i,j Tensors 200 8.3 Neutron Diffraction 201 8.3.1 Properties of the Neutron 201 8.3.2 The Strength of the Diffracted Intensity 202 8.3.3 Cross Sections for the Elements 203 8.3.4 Alloys 204 8.3.5 Differences with Respect to X-rays 205 8.3.6 Calculation of Transmission 205 8.4 Neutron Diffractometers 206 8.4.1 Elements of an Engineering Diffractometer 206 8.4.2 Monochromatic Beam Diffraction 206 8.4.3 Time-of-flight Diffractometers 209 8.5 Setting up an Experiment 210 8.5.1 Choosing the Beam-defining Slits or Radial Collimators 210 8.5.2 Calibration of the Wavelength and Effective Zero of the Angle Scale, 2
0 210 8.5.3 Calibration of a Time-of-flight Diffractometer 210 8.5.4 Positioning the Sample on the Table 211 8.5.5 Measuring Reference Samples 211 8.6 Analysis of Data 211 8.6.1 Monochromatic Beam Diffraction 211 8.6.2 Analysis of Time-of-flight Diffraction 212 8.6.3 Precision of the Measurements 213 8.7 Systematic Errors in Strain Measurements 213 8.7.1 Partly Filled Gage Volumes 213 8.7.2 Large Grain Effects 214 8.7.3 Incorrect Use of Slits 214 8.7.4 Intergranular Effects 215 8.8 Test Cases 215 8.8.1 Stresses in Indented Discs; Neutrons, Contour Method and Finite Element Modeling 215 8.8.2 Residual Stress in a Three-pass Bead-in-slot Weld 218 Acknowledgments 221 References 221 9 Magnetic Methods 225 David J. Buttle 9.1 Principles 225 9.1.1 Introduction 225 9.1.2 Ferromagnetism 226 9.1.3 Magnetostriction 226 9.1.4 Magnetostatic and Magneto-elastic Energy 227 9.1.5 The Hysteresis Loop 228 9.1.6 An Introduction to Magnetic Measurement Methods 228 9.2 Magnetic Barkhausen Noise (MBN) and Acoustic Barkhausen Emission (ABE) 229 9.2.1 Introduction 229 9.2.2 Measurement Depth and Spatial Resolution 230 9.2.3 Measurement 232 9.2.4 Measurement Probes and Positioning 233 9.2.5 Calibration 233 9.3 The MAPS Technique 235 9.3.1 Introduction 235 9.3.2 Measurement Depth and Spatial Resolution 237 9.3.3 MAPS Measurement 238 9.3.4 Measurement Probes and Positioning 239 9.3.5 Calibration 240 9.4 Access and Geometry 243 9.4.1 Space 243 9.4.2 Edges, Abutments and Small Samples 244 9.4.3 Weld Caps 244 9.4.4 Stranded Wires 244 9.5 Surface Condition and Coatings 244 9.6 Issues of Accuracy and Reliability 245 9.6.1 Magnetic and Stress History 245 9.6.2 Materials and Microstructure 246 9.6.3 Magnetic Field Variability 248 9.6.4 Probe Stand-off and Tilt 248 9.6.5 Temperature 249 9.6.6 Electric Currents 250 9.7 Examples of Measurement Accuracy 250 9.8 Example Measurement Approaches for MAPS 252 9.8.1 Pipes and Small Positive and Negative Radii Curvatures 252 9.8.2 Rapid Measurement from Vehicles 252 9.8.3 Dealing with 'Poor' Surfaces in the Field 253 9.9 Example Applications with ABE and MAPS 253 9.9.1 Residual Stress in
Welded Plate 253 9.9.2 Residual Stress Evolution During Fatigue in Rails 253 9.9.3 Depth Profiling in Laser Peened Spring Steel 254 9.9.4 Profiling and Mapping in Ring and Plug Test Sample 254 9.9.5 Measuring Multi-stranded Structure for Wire Integrity 255 9.10 Summary and Conclusions 256 References 257 10 Ultrasonics 259 Don E. Bray 10.1 Principles of Ultrasonic Stress Measurement 259 10.2 History 264 10.3 Sources of Uncertainty in Travel-time Measurements 265 10.3.1 Surface Roughness 265 10.3.2 Couplant 265 10.3.3 Material Variations 265 10.3.4 Temperature 265 10.4 Instrumentation 266 10.5 Methods for Collecting Travel-time 266 10.5.1 Fixed Probes with Viscous Couplant 267 10.5.2 Fixed Probes with Immersion 267 10.5.3 Fixed Probes with Pressurization 270 10.5.4 Contact with Freely Rotating Probes 270 10.6 System Uncertainties in Stress Measurement 270 10.7 Typical Applications 271 10.7.1 Weld Stresses 271 10.7.2 Measure Stresses in Pressure Vessels and Other Structures 272 10.7.3 Stresses in Ductile Cast Iron 273 10.7.4 Evaluate Stress Induced by Peening 273 10.7.5 Measuring Stress Gradient 273 10.7.6 Detecting Reversible Hydrogen Attack 273 10.8 Challenges and Opportunities for Future Application 274 10.8.1 Personnel Qualifications 274 10.8.2 Establish Acoustoelastic Coefficients (L11) for Wider Range of Materials 274 10.8.3 Develop Automated Integrated Data Collecting and Analyzing System 274 10.8.4 Develop Calibration Standard 274 10.8.5 Opportunities for LCR Applications in Engineering Structures 274 References 275 11 Optical Methods 279 Drew V. Nelson 11.1 Holographic and Electronic Speckle Interferometric Methods 279 11.1.1 Holographic Interferometry and ESPI Overview 279 11.1.2 Hole Drilling 282 11.1.3 Deflection 285 11.1.4 Micro-ESPI and Holographic Interferometry 286 11.2 Moiré Interferometry 286 11.2.1 Moiré Interferometry Overview 286 11.2.2 Hole Drilling 287 11.2.3 Other Approaches 289 11.2.4 Micro-Moiré 289 11.3 Digital Image Correlation 290 11.3.1 Digital Image Correlation Overview 290 11.3.2 Hole Drilling 291 11.3.3 Micro/Nano-DIC Slotting, Hole Drilling and Ring Coring 292 11.3.4 Deflection 293 11.4 Other Interferometric Approaches 294 11.4.1 Shearography 294 11.4.2 Interferometric Strain Rosette 294 11.5 Photoelasticity 294 11.6 Examples and Applications 295 11.7 Performance and Limitations 295 References 298 Further Reading 302 Index 303
