- Broschiertes Buch
- Merkliste
- Auf die Merkliste
- Bewerten Bewerten
- Teilen
- Produkt teilen
- Produkterinnerung
- Produkterinnerung
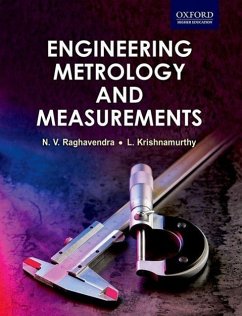
Engineering Metrology and Measurements is a textbook designed for students of mechanical, production and allied disciplines to facilitate learning of various shop-floor measurement techniques and also understand the basics of mechanical measurements.
Andere Kunden interessierten sich auch für
![Standards, Quality Control, and Measurement Sciences in 3D Printing and Additive Manufacturing Standards, Quality Control, and Measurement Sciences in 3D Printing and Additive Manufacturing]() Chee Kai ChuaStandards, Quality Control, and Measurement Sciences in 3D Printing and Additive Manufacturing119,99 €
Chee Kai ChuaStandards, Quality Control, and Measurement Sciences in 3D Printing and Additive Manufacturing119,99 €![Fundamentals of Dimensional Metrology Fundamentals of Dimensional Metrology]() Connie DotsonFundamentals of Dimensional Metrology164,99 €
Connie DotsonFundamentals of Dimensional Metrology164,99 €![Instrumentation and Measurements in Compressible Flows Instrumentation and Measurements in Compressible Flows]() Mrinal KaushikInstrumentation and Measurements in Compressible Flows104,99 €
Mrinal KaushikInstrumentation and Measurements in Compressible Flows104,99 €![Spectrum and Network Measurements Spectrum and Network Measurements]() Robert A. WitteSpectrum and Network Measurements117,99 €
Robert A. WitteSpectrum and Network Measurements117,99 €![Theory and Practice of Modern Antenna Range Measurements Theory and Practice of Modern Antenna Range Measurements]() Clive Parini (Queen Mary Universi Professor of Antenna EngineeringTheory and Practice of Modern Antenna Range Measurements192,99 €
Clive Parini (Queen Mary Universi Professor of Antenna EngineeringTheory and Practice of Modern Antenna Range Measurements192,99 €![Measurements and Their Uncertainties Measurements and Their Uncertainties]() Ifan Hughes (University of Durham Department of Physics)Measurements and Their Uncertainties37,99 €
Ifan Hughes (University of Durham Department of Physics)Measurements and Their Uncertainties37,99 €![The Science and Technology of Rubber The Science and Technology of Rubber]() The Science and Technology of Rubber161,99 €
The Science and Technology of Rubber161,99 €-
-
-
Engineering Metrology and Measurements is a textbook designed for students of mechanical, production and allied disciplines to facilitate learning of various shop-floor measurement techniques and also understand the basics of mechanical measurements.
Hinweis: Dieser Artikel kann nur an eine deutsche Lieferadresse ausgeliefert werden.
Hinweis: Dieser Artikel kann nur an eine deutsche Lieferadresse ausgeliefert werden.
Produktdetails
- Produktdetails
- Verlag: OUP India
- Seitenzahl: 676
- Erscheinungstermin: 1. Oktober 2013
- Englisch
- Abmessung: 239mm x 178mm x 23mm
- Gewicht: 716g
- ISBN-13: 9780198085492
- ISBN-10: 0198085494
- Artikelnr.: 39111829
- Herstellerkennzeichnung
- Libri GmbH
- Europaallee 1
- 36244 Bad Hersfeld
- 06621 890
- Verlag: OUP India
- Seitenzahl: 676
- Erscheinungstermin: 1. Oktober 2013
- Englisch
- Abmessung: 239mm x 178mm x 23mm
- Gewicht: 716g
- ISBN-13: 9780198085492
- ISBN-10: 0198085494
- Artikelnr.: 39111829
- Herstellerkennzeichnung
- Libri GmbH
- Europaallee 1
- 36244 Bad Hersfeld
- 06621 890
Dr N V Raghavendra is a professor, Department of Mechanical Engineering, National Institute of Engineering, Mysore. Prof. Raghavendra was a member of the Implementation Committee of the prestigious VTU-Bosch Rexroth Centre of Automation Technology, Mysore. He also served as the Special Officer of the VTU-Bosch Rexroth Centre from September 2007 to December, 2008. Presently he is the Coordinator of CNC Training Centre of the Institute and Director of NIE-Eicher Centre for Automobile Technology. Dr L Krishnamurthy is a professor, Department of Mechanical Engineering, National Institute of Engineering, Mysore. He co-investigates the research project titled "Characterization of Composite Materials and Application of Nanomaterials for Sustainable Energy", sanctioned by Nano Mission, Department of Science and Technology, Government of India.
1.1 Introduction
1.2 Metrology Defined
1.3 Need for Inspection
1.4 Accuracy and Precision
1.4.1 Accuracy and Cost
1.5 Objectives of Metrology and Measurements
1.6 General Measurement Concepts
1.6.1 Calibration of Measuring Instruments
1.7 Error in Measurements
1.7.1 Systematic and Controllable Errors
1.7.2 Random Errors
1.8 Methods of Measurement
2.1 Introduction
2.2 Standards and their Roles
2.3 Evolution of Standards
2.4 The National Physical Laboratory (NPL)
2.5 Material Standard
2.5.1 Yard
2.5.2 Metre
2.5.3. Disadvantages of Material Standard
2.6 Wavelength Standard
2.6.1 The Modern Metre
2.7 Subdivisions of Standards
2.8 Line and End Measurement
2.8.1 Characteristics of Line Standards
2.8.2 Characteristics of End Standards
2.8.3 Transfer from Line Standard to End Standard
2.9 Brookes Level Comparator
2.10 Displacement Method
2.11 Calibration of End Bars
3.1 Introduction
3.2 Principle of Interchangeability
3.2.1 Selective Assembly Approach
3.3 Tolerances
3.3.1 Computer Aided Modelling
3.3.2 Manufacturing Cost and Work Tolerance
3.3.3 Classification of Tolerances
3.4 Maximum and Minimum Metal Conditions
3.5 Fits
3.5.1 Allowance
3.5.2 Hole Basis and Shaft Basis System
3.6 Systems of Limits and Fits
3.6.1 General Terminologies
3.6.2 Limit Gauging
3.6.3 Classification of Gauges
3.6.4 Taylor's Principle
3.6.5 Important guidelines for gauge design
3.6.6 Material for Gauges
3.6.7 Gauge Tolerance
3.6.8 Wear Allowance
3.6.9 Methods of Tolerance Specification on Gauges
3.7 Plain Plug Gauges
3.8 Snap Gauges
4.1 Introduction
4.2 Design of Linear Measurement Instruments
4.3 Surface Plate
4.4 V Blocks
4.5 Graduated Scales
4.6 Scaled Instruments
4.6.1 Depth Gauge
4.6.2 Combination Set
4.6.3 Calipers
4.7 Vernier Instruments
4.7.1 Vernier Calipers
4.7.2 Vernier Depth Gauge
4.7.3 Vernier Height Gauge
4.8 Micrometer Instruments
4.8.1 Outside Micrometer
4.8.2 Vernier Micrometer
4.8.3 Digital Micrometer
4.8.4 Inside Micrometer Caliper
4.8.5 Inside Micrometer
4.8.6 Depth Micrometer
4.8.7 Floating Carriage Micrometer
4.9 Slip Gauges
4.9.1 Gauge Block Shapes, Grades and Sizes
4.9.2 Wringing of Slip Gauges
4.9.3 Manufacture of Slip Gauges
4.9.4 Calibration of Slip Gauges
5.1 Introduction
5.2 Protractor
5.2.1 Universal Bevel Protractor
5.2.2 Optical Bevel Protractor
5.3 Sine Bar
5.3.1 Sine Blocks, Sine Plates, and Sine Tables
5.3.2 Sine Centre
5.4 Angle Gauges
5.4.1 Uses of Angle Gauges
5.4.2 Manufacture and calibration of angle gauges
5.4.3 True Square
5.5 Spirit Level
5.5.1 Clinometer
5.6 Optical Instruments for Angular Measurement
5.6.1 Autocollimator
5.6.2 Autocollimator Applications
5.6.3 Angle Dekkor
6.1 Introduction
6.2 Functional Requirements
6.3 Classification of Comparators
6.4 Mechanical Comparators
6.4.1 Dial Indicators
6.4.2 Johansson Microkator
6.4.3 Sigma Comparator
6.5 Mechanical Optical Comparator
6.5.1 Zeiss Ultra Optimeter
6.5.2 Optical Projector
6.6 Electrical and Electronic Comparators
6.6.1 LVDT
6.6.2 Electronic Comparator
6.7 Pneumatic Comparator
6.7.1 Free Flow Air Gauge
6.7.2 Back Pressure Gauge
6.7.3 Solex Pneumatic Gauge
6.7.4 Applications of Pneumatic Comparators
7.1 Introduction
7.2 Optical Measurement Techniques
7.2.1 Tool Maker's Microscope
7.2.2 Profile Projector
7.2.3 Optical Squares
7.3 Optical Interference
7.4 Interferometry
7.4.1 Optical Flats
7.5 Interferometers
7.5.1 The NPL Flatness Interferometer
7.5.2 Pitter-NPL Gauge Interferometer
7.5.3 Laser Interferometers
7.6 Scales, Grating, and Reticles
7.6.1 Scales
7.6.2 Gratings
7.6.3 Reticles
8.1 Introduction
8.2 Gear Terminology
8.3 Error in Spur Gears
8.4 Measurement of Gear Elements
8.5 Composite Method of Gear Inspection
8.5.1 Parkinson Gear Tester
8.6 Measurement of Screw Threads
8.7 Screw Thread Terminology
8.8 Measurement of Screw Thread Elements
8.8.1 Measurement of Major Diameter
8.8.2 Measurement of Minor Diameter
8.8.3 Measurement of Effective Diameter
8.8.4 Measurement of Pitch
8.9 Thread Gauges
9.1 Introduction
9.2 Surface Metrology Concepts
9.3 Terminologies
9.4 Analysis of Surface Traces
9.4.1 Ten Point Height Average Value
9.4.2 Root Mean Square Value
9.4.3 Central Line Average Value
9.5 Specification of Surface Texture Characteristics
9.6 Methods of Measuring Surface Finish
9.7 Stylus System of Measurement
9.7.1 The Stylus and Datum
9.8 Stylus Probe Instruments
9.8.1 Tomlinson Surface Meter
9.8.2 Taylor-Hobson Talysurf
9.8.3 Profilometer
9.9 Wavelength, Frequency, and Cutoff
9.10 Other Methods of Measuring Surface Roughness
9.10.1 Pneumatic Method
9.10.2 Light Interference Microscope
9.10.3 Mecrin Instrument
10.1 Introduction
10.2 Precision Instrumentation based on Laser Principles
10.3 Coordinate Measuring Machines (CMM)
10.3.1 Structure of CMM
10.3.2 Modes of Operation
10.3.3 The Probe
10.3.4 Operation of CMM
10.3.5 Major Applications of CMM
10.4 Machine Tool Metrology
10.4.1 Straightness, Flatness, Parallelism, Squareness, Roundness, Cylindricity, and Runout
10.4.2 Acceptance Test for Machine Tools
10.5 Automated Inspection
10.6 Machine Vision
10.6.1 Stages of Machine Vision
10.6.2 Applications of Machine Vision in Inspection
11.1 Introduction
11.2 Inspection
11.3 Specifying the Limits of Variability
11.4 Dimensions and Tolerances
11.5 Selection of Gauging Equipment
11.6 Gauge Control
11.7 Quality Control and Quality Assurance
11.8 Statistical Quality Control
11.8.1 Process Variability
11.8.2 Importance of Sampling
11.8.3 SQC by Attributes
11.8.4 SQC by Variables
11.9 Total Quality Management
11.9.1 Customer Focus
11.9.2 Continuous Improvement
11.9.3 Employee Empowerment
11.9.4 Use of Quality Tools
11.9.5 Product Design
11.9.6 Process Management
11.9.7 Managing Supplier Quality
11.10 Six Sigma
11.10.1 Six Sigma Approach
11.10.2 Training for Six Sigma
11.11 Quality Standards
11.11.1 Quality Management Principles of ISO 9000
11.11.2 Implementing ISO Standards
12.1 Introduction
12.2 Some Basic Definitions
12.2.1 Hysteresis in Measurement Systems
12.2.2 Linearity in Measurement Systems
12.2.3 Resolution of Measuring Instruments
12.2.4 Threshold
12.2.5 Drift
12.2.6 Zero Stability
12.2.7 Loading Effects
12.2.8 System Response
12.3 Functional Elements of Measurement Systems
12.4 Primary Detector-Transducer Stage
12.5 The Intermediate Modifying Stage
12.6 The Output or Terminating Stage
13.1 Introduction
13.2 Transfer Efficiency
13.3 Classification of Transducers
13.3.1 Primary and Secondary Transducers
13.3.2 Based on Principles of Transduction
13.3.3 Active and Passive Transducers
13.3.4 Analog and Digital Transducers
13.3.5 Transducers and Inverse Transducers
13.3.6 Null and Deflection Type Transducers
13.4 Quality Attributes for Transducers
13.5 Intermediate Modifying Devices
13.5.1 Inherent Problems in Mechanical Systems
13.5.2 Kinematic Linearity
13.5.3 Mechanical Amplification
13.5.4 Reflected Frictional Amplification
13.5.5Reflected Inertial Amplification
13.5.6 Amplification of Backlash and Elastic Deformation
13.5.7 Tolerance Problems
13.5.8 Temperature Problems
13.6 Electrical Intermediate Modifying Devices
13.6.1 Input Circuitry
13.6.2 Simple Current Sensitive Circuit
13.6.3 Ballast Circuit
13.6.4 Electronic Amplifiers
13.6.5 Telemetry
13.7 Advantages of Electrical Intermediate Modifying Devices
13.8 Terminating Devices
13.8.1 Metering Indicators
13.8.2 Mechanical Counters
13.8.3 Cathode Ray Oscilloscope (CRO)
13.8.4 Oscillographs
13.8.5 X-Y Plotters
13.8.6 Stroboscopic Measurements
14.1 Introduction
14.2 Measurement of Force
14.2.1 Direct Methods
14.3 Elastic Members
14.3.1 Load Cells
14.3.2 Cantilever Beams
14.3.3 Proving Rings
14.3.4 Differential Transformers
14.4 Measurement of Torque
14.4.1 Torsion Bar Dynamometer
14.4.2 Servo Controlled Dynamometers
14.4.3 Absorption Dynamometers
14.5 Measurement of Strain
14.5.1 Mechanical Strain Gauges
14.5.2 Electrical Strain Gauges
14.6 Strain Gauge Materials
14.7 Backing or Carrier Materials
14.9 Adhesives
14.10 Protective Coatings
14.11 Bonding of Gauges
14.12 Gauge Factor
14.13 Theory of Strain Gauges
14.14 Methods of Strain Measurements
14.15 Strain Gauge Bridge Arrangement
14.16 Temperature Compensation in Strain Gauges
14.16.1 Adjacent Arm Compensating Gauges
14.16.2 Self Temperature Compensation
15.1 Introduction
15.2 Methods of Measuring Temperature
15.3 Thermocouples
15.3.1 Law of Thermocouples
15.3.2 Thermocouple Materials
15.3.3 Thermopiles
15.4 Resistance Temperature Detectors (RTD)
15.5 Thermistors
15.6 Liquid In Glass Thermometers
15.7 Pressure Thermometers
15.8 Bimetallic Strip Thermometers
15.9 Pyrometry
15.9.1 Total Radiation Pyrometer
15.9.2 Optical Pyrometer
15.9.3 Fibre Optic Pyrometers
16.1 Introduction
16.2 Pressure Measurement Scales
16.3 Methods of Pressure Measurement
16.3.1 Static Pressure Measurement
16.3.2 Classification of Pressure Measuring Devices
16.3.3 Manometers for Pressure Measurement
16.4 Ring Balance
16.5 Inverted Bell Manometer
16.6 Elastic Transducers
16.7 Elastic Pressure Transducers
16.7.1 Resistance Type Transducers
16.7.2 Potentiometer Devices
16.7.3 Inductive Type Transducer
16.7.4 Capacitive Type Pressure Transducer
16.7.5 Piezo Electric Type Pressure Transducer
16.7.6 Varying Pressure Measurement
16.8 Dead Weight Pressure Gauge
16.9 Measurement of Vacuum
16.9.1 McLeod Gauge
16.9.2 Pirani Gauge
16.9.3 Ionization Gauge
16.9.4 Knudsen Gauge
16.10 Measurement of High Pressure
17.1 Introduction
17.2 Nanotechnology
17.2.1 Importance of Nano Dimension
17.2.1 Classification of Nanostructures
17.2.3 Applications
17.3 Importance of Nanometrology
17.4 Introduction to Microscopy
17.4.1 Transmission Electron Microscope (TEM)
17.4.2 Scanning Electron Microscope (SEM)
17.4.3 Scanning Tunnelling Microscope (STM)
17.4.4 Atomic Force Microscope (AFM)
17.5 X-ray Diffraction System (XRD)
Appendix A: Universal Measuring Machine
Appendix B: Fluid Flow Measurements
Appendix C: Laboratory Manual
Appendix D: Quality Control Charts

